Friday, 19 October 2012

New baby boy cakes!

With 3 different sets of neighbours on my block having babies (all boys) within 4 weeks of each other, I wanted to create something unique, special and different for some "Congratulations on your new baby boy" gifts...

So, of course, I decided to bake.

With the success of mixing two colours together with my horse cupcakes earlier this week, I thought that this time I would combine three colours together. The three babies born on my block were all boys, so the colours I chose to combine were blue, green, and white.

Without wanting to refill my piping bag (and because I figured there'd be less mess this way), I stood the piping bag up in a glass. I didn't actually need as much icing as I put in, so I may just have to bake more cupcakes to use it all up ;)

This will definitely be a method I will use again. The glass held the bag steady so that I could just keep spooning more and more icing into it (probably why I spooned in a bit too much in the first place, though)...


I still have some practicing to do with piping techniques, but this is by far the easiest method of icing I have come across. There's no spreading, no scraping. Just line up the nozzle and squeeze :)

This is what the icing piped onto my 'baby boy cakes' looked like:


For the baby feet (I've wanted to create these for ages), I had thought of using jelly beans, but I am all for matching, and because I only had white or chocolate fudge writing gel things, I used chocolate coated sultanas instead.


Dabbing the toes on meant precision, symmetry, and dedication... At least for the first couple of cupcakes. Unfortunately, they look more like bear feet than baby feet, and some of the feet have webbed toes, but this is what they all look like!


To wrap up the cupcakes, I went to the local take away store and purchased cardboard noodle containers. Once putting cupcakes inside, I wrapped them up with blue cellophane :)

For cards, I made my own with some plain cardboard and wrapping paper. I had some Baby Boy Christening Day wrapping paper (for some reason - unused), and began to cut out a couple of the pictures to stick on. Then with a silver paint texta, I wrote "Congratulations!" down the bottom!


Newborn babies are so sweet and little and cute and precious, and I am not clucky at all... Ah who am I kidding, I totally am ;)

Wednesday, 17 October 2012

Feeling a little horse...

Today I had one of those rare and amazingly productive days, filled with 3 loads of washing, the tidying up of 4 bedrooms and two bathrooms, getting up-to-date with the washing up, and organising (again) the pantry...

The afternoon rolled around (a bit too quickly), and as I went outside to bring in some of the dried washing, I found my dog eating a shirt of my daughter's! Her Grandpa got it for her from overseas a couple of years ago, and (after getting so cranky at him -and everyone else in sight unfortunately-), I was heartbroken...

I'm not sure what others do when they are completely overwhelmed with all sorts of emotions*, but I often bake.

I had absolutely no idea what I was going to do with the cupcakes once they were done, but still made the mixture and spooned them into the patty cases, ready to bake anyway.

Not long after they were in the oven, I saw on Facebook that the church play group I take my youngest to was looking for someone to bring some morning tea in for the parents the next day... Brilliant! A plan was then underway to find out what animal we'd be learning about, and make cupcakes to match.

The animal was horses.

So, thinking quickly, I printed out little horse outlines and melted some chocolate in the microwave. With dark chocolate, I traced the horses' bodies. Then, with milk chocolate, I added their tails, manes and an eye.


With the icing, I thought that today I'd try something different... I made a batch of buttercream, separated it in half, and added cocoa to one of the halves... Then I alternated spooning each of them into a piping bag to pipe onto the cupcakes that had cooled down by this stage. This was the first time I'd combined different coloured icing to pipe, and I am happy with the result! After refilling the piping bag, I found that the colours then blended a bit more, but I was alright with that :)


The piping was done, and I added the chocolate horses on top!


I am feeling much better now.
In fact, I'm even hungry enough to eat a little horse ;)

* I'd actually really love to know what others do in these situations! Does anyone else find spontaneous baking therapeutic?

Saturday, 13 October 2012

Disney Party!

My daughter, Tamara, has just turned 8. She had requested (in July, while I was organising my son's  party) a Disney themed party to celebrate! Organisations for the party were underway (much, much later than July). I found an awesome Disney font generator site which I used for her party invitations, along with a Disney picture of Tamara's choice on the front. They looked like this:


When the children arrived for the party, I had some 'craft' already set up on the table, which had a purple plastic table cover to be Disney themed: Fairy wands (admittedly, this was a left-over idea from 4FAMILIES), and Scoobie bracelets (which actually proved a bit tricky and wasn't really an interest for the kids anyway)... So, just the fairy wands it was!


There was also a guessing competition! Inside washed and dried baby food jars, I had placed M 'n' Ms and gummy bears. I titled them 'Mickey Mouse droppings', and 'Baby Brother Bears'. Reuben thought the first one was pretty gross, but hey - I don't think the kids actually paid attention to what they were called anyway! With some black cardboard and sticky tape, I cut out mouse ears and put it on top:


Games we played started with 'Pin the hair on Rapunzel'. For this, I printed out a picture of Rapunzel without long hair, and after kicking myself for not buying yellow wool as soon as I saw it at a discount shop, I thankfully found a yellow hula skirt, so with a bit of last-minute improvisation, I tied some of the strands in little bunches, and then snipped them off the skirt... That made Rapunzel's 'hair' to stick on. With names written on paper and taped to the bottom of each bunch, the kids lined up perfectly and waited patiently for their turn at the game! Rapunzel ended up with hair everywhere :)


Next up was Disney Bingo! This was the whole reason Tamara wanted a Disney themed party! As I was designing bingo cards for Ben's Pokémon party earlier this year, Tamara had already decided that she wanted me to make Disney bingo cards so that Bambi could be on them! ... I had fun making these, actually, even though there were so many Disney characters to choose from! It was hard to round it down to just a couple of handfuls... Again, a small plastic cup filled with smarties were used for counters. Here's what one of the cards looked like:


I used the Disney font site to make the names of the characters, to hold up as the game was played. I think this is one of my favourite parts of parties - when all the children sit quietly and patiently, waiting for their chance to scream out 'Bingo' if they had a row of smarties on their cards, or 'DISNEY' if they had filled the whole page with smarties... And then of course eat them :)


We then played a bowling game with a small ball and little army figures (like from Toy Story) but I did not have a chance to photograph in between balls rolling everywhere and army men to straighten up for the next go.

For lunch, the kids made their own pizzas! Prior to the party, I cut up squares of baking paper to write the kids' names on them so that they didn't all get mixed up in the oven.


Ingredients came out, pizza bases were ready (i.e. defrosted), names were written - it was time to get some pizza making skills happening! The kids really liked this, and they were patient waiting for sauce, and shared the ingredients so beautifully. Many points for my husband who organised how to fit so many pizzas into the oven at one time!


I over estimated how much ham, pineapple and cheese that would be needed, so there was enough left for my husband and I to make pizzas as well... And potentially we will be making pizzas for the next few days, too :)


Dessert included:

- Shortbread cars with mini Oreo biscuits as wheels (and also mini shortbread cars with brown M 'n'Ms as wheels), both decorated with blue and yellow 'royal icing'.

- Tim Tam traffic lights (with red, orange and green M 'n' Ms attached with melted chocolate)
- Disney cupcakes


With my new found interest in melting chocolate (in snap lock bags in the microwave), I printed out some Mickey Mouse outlines to use for the Disney cupcakes... Purple buttercream icing was piped on top, and then a Mickey outline was placed on top of that.


And just to add a bit of spark, the 'candle' was actually a number 8 shaped sparkler! I did not realise such things existed until I found it.


For some decorations, I cut out (probably too many) cardboard stars to put up around the house and on the front door... I did start painting them with glitter paint (yes, seriously - the things we do for our children!), but after a few I lost a bit of interest, and figured that no one would notice anyway! The glitter painted ones went on the front door anyway, and the others just remained plain white.

As the mother of the birthday girl, I thought I should at least dress up a tiny bit... So with some black cardboard, sticky tape, and a headband, I made myself some Mickey Mouse ears to wear.

Happy birthday sweetheart! :)

Thursday, 11 October 2012

My son and his creative cooking...

It gives me a nice, fuzzy feeling when I see my children be creative.

Ben, my 9 year old, has started cooking himself breakfast most mornings. Bacon and eggs, pancakes, and omeletes are his 'specialties'. He likes re-creating McDonalds' McMuffins, and when we don't have english muffins, he uses bread and makes it into a toasted sandwich... During the school holidays, he made a bacon and egg toasted sandwich for himself, and latticed 'stringer' cheese on top! This has now become his 'usual' whenever he uses cheese in cooking:


He also makes himself lunch - ham and cheese toasted sandwiches (or 'jaffles'), with stringer cheese arranged like an asterix on top:


I love watching him grow up, and become so independent! It's a little scary that he's already taller than my shoulders (though my husband often remarks and laughs at that), and probably in 18 months he will be taller than me, but his culinary skills are improving each time he cooks (and he's now learnt not not to put the frypan straight into the sink because it melts plastic cups and bowls that are in there needing to be washed up!)

I was so impressed with how much cooking he'd begun that I bought him his own little frypan to use ($7 at ALDI well spent!) - he was so pleased and thankful, as was I, as it's a much littler frypan to wash up numerous times a week! :)

I'm also impressed with the different types of ingredients he uses... The first time he made an omelet, and I asked what he was going to put in it, he replied "Bacon, cheese and lettuce". "Gross!" I thought! But turned around to see that it was baby spinach he was adding to his mixture. Now he will always put baby spinach in his omeletes, which I simply marvel at - because most (generally) children would fight you for even thinking about making them eat their greens and salad!

We must be doing something right! :)

Monday, 8 October 2012

A (fruity) cupcake kind of day...

My favourite cupcake recipe book proves successful once again! 'Wild about Cupcakes' by Rachel Lane. Being Spring, I've decided to make cupcakes with fruit in and/or on top of them, simply because they look healthier...

First, I made 'Blueberry and Yoghurt Cupcakes'.

I learnt a valuable lesson making these: Even though 'vanilla ice cream' is sort of like the basic ice cream without flavour and colour, this does not mean that vanilla yoghurt is the same! This recipe had yoghurt in the mixture, and placed on top. I wondered why the yoghurt on top kept dripping down and wasn't all plump like the ones in the photo - and that would have explained why... This is what they were supposed to look like:


And this is what mine looked like ->

They matched (sort of) appearance wise... But the yoghurt certainly made the difference with how sweet they were!

These were from the 'Simple and Healthy' section of the cupcake book, and they were really yummy, despite using the wrong yoghurt on top! My son and I both share a passion for blueberries, and we both enjoyed eating these!

These next ones I made for a recent Cancer Council fundraiser... They're called 'Banana Split Cupcakes'... This is what they were supposed to look like:


And this is what mine looked like ->

Having learnt my lesson previously with the blueberry cupcakes, I used the proper yoghurt this time.

Mine look more... Cluttered. But... Fuller, with yellow patties instead of pale green (can't go out buying different coloured cases every time I bake - that would be silly)


There was some good feedback with the banana split cupcakes. The banana slices on top kept falling over a bit, though, which for the perfectionist like me can be frustrating! But, once the chocolate was melted over the top, you couldn't really tell :)


I don't think I've ever liked anything (hobby-wise) as much as I like
baking and decorating cupcakes... Can you tell? :)

Friday, 5 October 2012

Magic cupcakes!

Last week at church, we had a real magician! He was fantastic, engaging, and captured our hearts and eyes with amazing tricks and a gospel message. I volunteered to provide dessert for the day, and here is the story behind it...


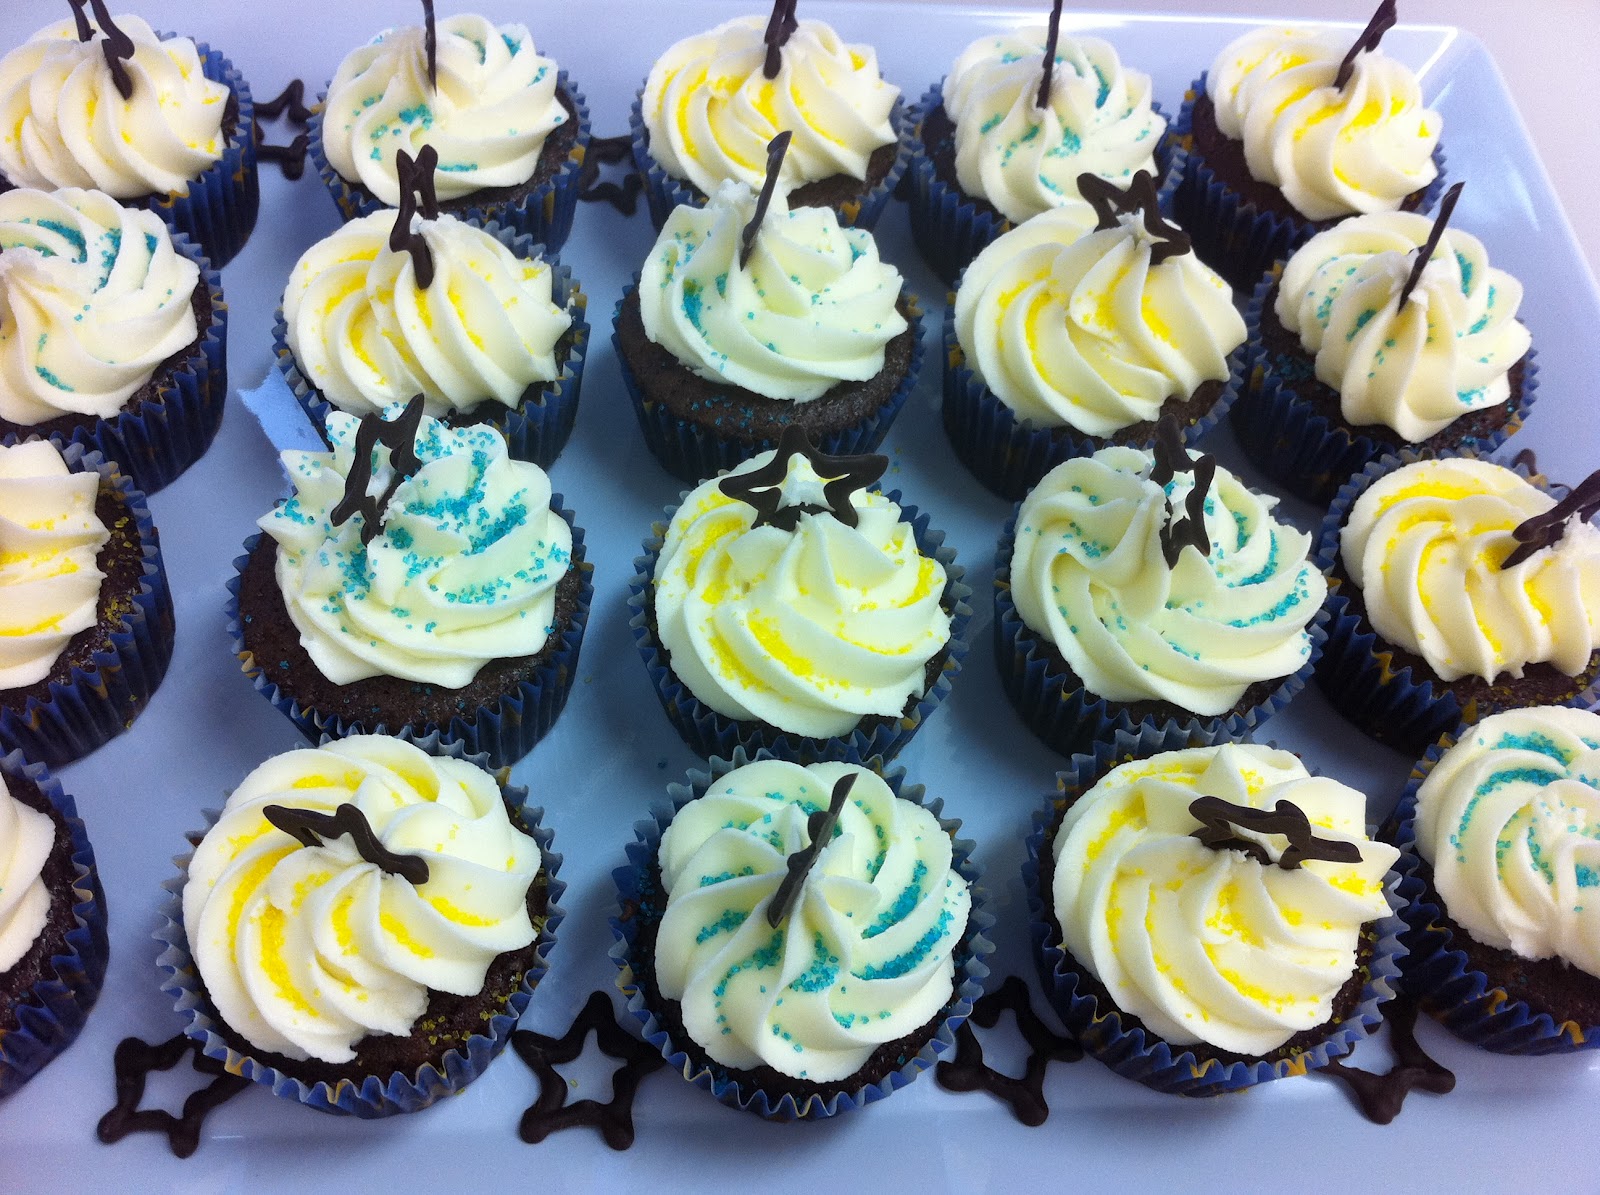
Without having any real idea for what to do for 100 somehow-Magic-related cupcakes for Magic Sunday, I went cake shop shopping... With the colour purple in mind, I found blue patty cases with yellow stars on them (not exactly purple, but pretty close). That could work - I could make wizard hats! Hmm... Perhaps I should make something simple enough to replicate so many times, though...

I left with the blue and yellow patty cases, a product called 'Solite' (which is apparently tasteless and when used in buttercream icing, makes icing white rather than pale yellow); and some yellow and blue sanding sugar to match the patty cases...

Time to get creative! I had made the cupcakes a couple of days prior, and froze them so they stayed fresh. I took them out the morning of Magic Sunday, ready to ice and decorate!


I hadn't used 'Solite' before, but following the instructions the cake shop gave me, i measured what I needed and started mixing. 200g Solite, and 200g margarine.


1.5kg of icing sugar later, and the icing was ready! Time was running low now, though... In my head, I had thought of making 4 different icing varieties - white, chocolate, blue, and yellow. No time for that now! I rearranged my thoughts to using just white icing on all the cupcakes, and then I would sprinkle the sanding sugar on top, half with blue and half with yellow... Excellent :)

I had lots of chocolate melts that didn't end up being used for the magic wafer wands, so thought of things that could be used with that... Stars! I printed out a page of star outlines, and covered it with baking paper. I found a brilliant idea of microwaving chocolate in snap lock bags from this website. I had never thought of that! I'd  always thought to melt the chocolate first, then pour it into a piping bag. This was so much easier! I snipped the corner once it was melted, and started piping the chocolate onto the baking paper, 'tracing' the stars that were underneath:


I piped the icing onto the cupcakes (half were vanilla and half were chocolate), and sprinkled the sanding sugar over them all. Once that was done, I placed a chocolate star on top of each :)


And these were my magic-themed cupcakes for Magic Sunday :)

Monday, 1 October 2012

A poem for my husband...

While he was in the shower
getting nice and clean,
I was in the laundry
getting clothes from the machine.

I hung them out to dry, because
today was nice and sunny,
and then came back inside
to wipe a boy’s nose that was runny.

I gave the older kids jobs to complete,
starting with cleaning their room.
Ben finished first, so “Hmm, let’s see;
you can go pick up dog poo”.

I unhooked the couch into pieces
so I could vacuum underneath..
I was disgusted that the things I’d found
had started growing teeth.

Another load went in the wash;
the dog was given some water.
As I heard the shower come to a finish
I gave new tasks to our daughter.

I was eager to show him what we had done
as soon as he was dressed.
He emerged with a brand-new dirty mo’,
and I was unimpressed!

I put him to work almost straight away
patching holes, and building a chair.
Not wanting to look at that patch on his chin
where he’d shaved away his hair.

His many chores completed
did not absolve this shocker.
I thought I’d married Iron Man,
but instead, I’d married Chopper.


Dirty, dirty, dirty...